Setup S3 bucket website
In this exercise, you will set up a web site hosted on Amazon S3. The web site will demonstrate the various messaging options, orchestrated from the web browser. In the lab, you will be guided through exploring the AWS configuration that the lab has set up for you.
Contents
Create, configure and populate an S3 Bucket Website
- Create an Amazon S3 bucket to store the website source.
You can do this from the AWS Console, or from the command line, by issuing this command in a terminal window from Cloud9:
aws s3 mb s3://idevelop-lab5-<yourinitials> --region ap-northeast-1
If you are using the Windows Host and Eclipse, don’t forget to add --profile aws-lab-env
The bucket name must be globally unique so we suggest using your initials in the bucket name to make it unique.
If you receive an error that the bucket name is unavailable, use some extra characters after your initials to create a uniquely-named bucket.
Remember the name you use for the S3 bucket because you will need to refer to this bucket name later in the lab.
- Now please choose the right path for your environment:
- CLOUD9 If you are using the cloud 9 environment do the following to deploy:
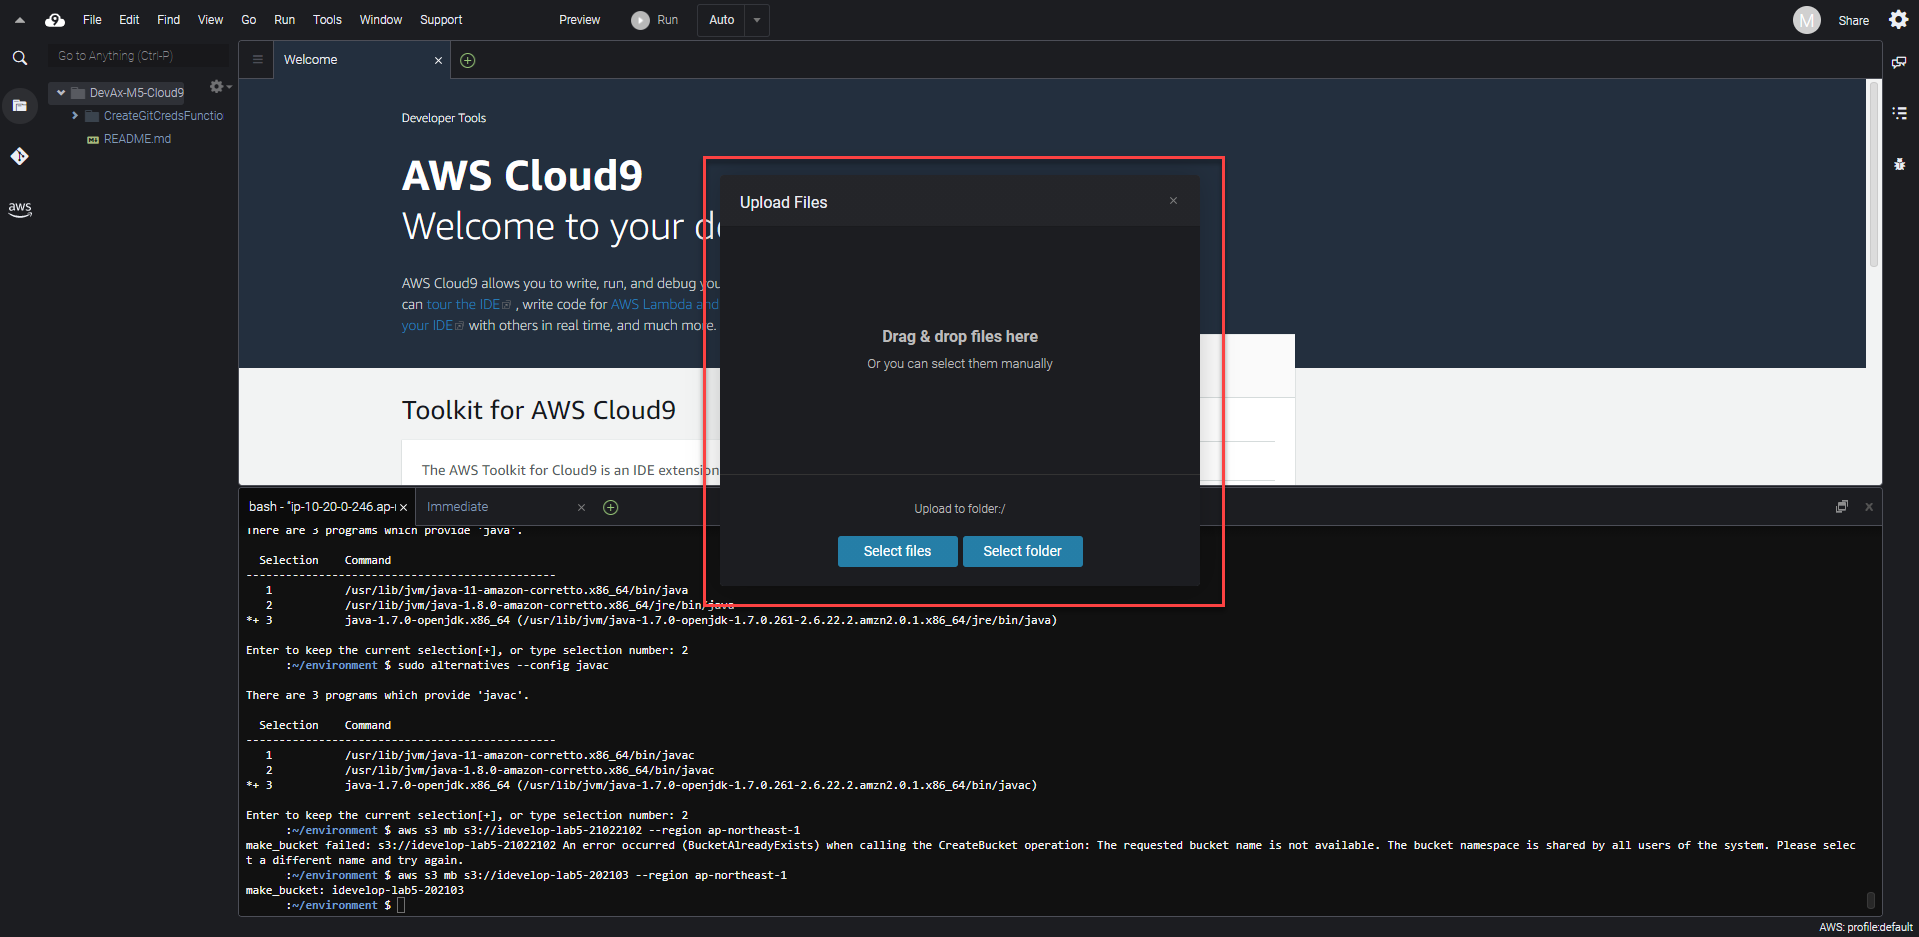
Option 1: Download Messaging.zip to your downloads directory. On Cloud9 File -> Upload Local Files…
Option 2: Download the file below to your downloads directory. On Cloud9 File -> Upload Local Files…
Option 3:
wget -L http://workshops.devax.academy/monoliths-to-microservices/module5/files/Messaging.zip
- ECLIPSE
Option 1:
Download the source code bundle from Messaging.zip and explode the zip file onto your filesystem. File -> Upload project from your filesystem… . Put in the unzipped files and import it into Eclipse as done previously.
Option 2:
Download the file below, copy to your remote machine then explode the zip file onto your filesystem. File -> Upload project from your filesystem… . Put in the unzipped files and import it into Eclipse as done previously.
- Use the IDE of your choice to open the file
<path_to_exploded_zip>/scripts/aws-config.js. The file has the following contents:
Note the region in the config script - change this to be your region you are using.
var config = {
  Region: "ap-northeast-1",

  Cognito: {
    IdentityPoolId: "REPLACE_WITH_COGNITO_IDENTITY_POOL_ID",
  },

  SQS: {
    Standard: {
      QueueUrl: "REPLACE_WITH_QUEUE_URL_1",
    },
    Secondary: {
      QueueUrl: "REPLACE_WITH_QUEUE_URL_2",
    },
    Tertiary: {
      QueueUrl: "REPLACE_WITH_QUEUE_URL_3",
    },
    FIFO: {
      QueueUrl: "REPLACE_WITH_QUEUE_URL_FIFO",
      GroupId: "idevelop_sqs_fifo",
    },
  },

  SNS: {
    TopicARN: "REPLACE_WITH_SNS_TOPIC_ARN",
  },

  Kinesis: {
    StreamName: "iDevelopDrawingData",
    PartitionKey: "Partition1",
  },

  IoT: {
    Endpoint: "REPLACE_WITH_IOT_ENDPOINT",
    Topic: "idevelop/drawingdemo",
  },
};
Notice there are several REPLACE_WITH_XXX values? You need to update this file and replace those placeholders with the correct ARNs and URLs from your lab environment. The table below shows the values that need to be replaced, and you can find the values to replace with in the labs console in the Output of the original Cloudformation stack which was used to install your environment.
Open a terminal in your IDE and run the following to use the AWS CLI to get the required outputs below:
Remember you will need to use --profile aws-lab-env if you are on the windows server. If you are using cloud9, this will use the AWS Role to enable you to do this, so it has the permissions on the actual EC2 cloud9 instance.
export dets=$(aws cloudformation describe-stacks --query "Stacks[?StackName>'mod'].StackName" --output text)
echo $dets
aws cloudformation describe-stacks --stack-name $dets --query "Stacks[].Outputs[*].[OutputKey,OutputValue]"
Notice this provides all the details you need above. Lets take this a bit further and grab out the elements you want using shell :
aws cloudformation describe-stacks --stack-name $dets --query "Stacks[].Outputs[?OutputKey=='QueueUrl2'][OutputValue]" --output text
Here’s a re-usable script to think about for future in a terminal to get parameters
cat << EOF > list
CognitoIdentityPoolId
QueueUrl1
QueueUrl2
QueueUrl3
FIFOQueueUrl
TopicARN
EOF
This will produce a file called list which we can iterate through:
for i in `cat list`
do
echo $i
aws cloudformation describe-stacks --stack-name $dets --query "Stacks[].Outputs[?OutputKey=='$i'][OutputValue]" --output text
done
Output will look like this:
CognitoIdentityPoolId
ap-northeast-1:dXXX-XXX0-4XXX-XXX-dXXXX
QueueUrl1
https://sqs.ap-northeast-1.amazonaws.com/XXXX/idevelop_drawqueue_1
QueueUrl2
https://sqs.ap-northeast-1.amazonaws.com/XXXX/idevelop_drawqueue_2
QueueUrl3
https://sqs.ap-northeast-1.amazonaws.com/XXXX/idevelop_drawqueue_3
FIFOQueueUrl
https://sqs.ap-northeast-1.amazonaws.com/XXXX/idevelop_drawqueue.fifo
TopicARN
arn:aws:sns:ap-northeast-1:XXXX:iDevelopMessageDuplicator
| Replace this placeholder… | With this the value with the label.. |
|---|---|
| REPLACE_WITH_COGNITO_IDENTITY_POOL_ID | CognitoIdentityPoolId |
| REPLACE_WITH_QUEUE_URL_1 | QueueUrl1 |
| REPLACE_WITH_QUEUE_URL_2 | QueueUrl2 |
| REPLACE_WITH_QUEUE_URL_3 | QueueUrl3 |
| REPLACE_WITH_QUEUE_URL_FIFO | FIFOQueueUrl |
| REPLACE_WITH_SNS_TOPIC_ARN | TopicARN |
The labs setup process will take a few minutes to complete, and may not have finished when you get to this part of the lab guide. If that is the case, you can either wait for the lab setup to complete, or, you can retrieve the values above from the Resources tab of the CloudFormation console, for the stack that is creating these resources. See if you can locate the relevant values and complete filling out the configuration yourself - or wait for the labs setup to complete.
- There is one more item to replace, REPLACE_WITH_IOT_ENDPOINT. You need to query the AWS environment to determine this value. In the terminal window, issue the following command:
aws iot describe-endpoint --endpoint-type iot:Data-ATS --region ap-northeast-1 --profile aws-lab-env
You will see a response similar to this:
{
  "endpointAddress": "a33e9q9lyxxxxx-ats.iot.ap-northeast-1.amazonaws.com"
}
- Copy the endpointAddress value from your terminal, and replace the REPLACE_WITH_IOT_ENDPOINT value in the aws-config.js script with your value.
- Save the changes you have made to the aws-config.js file.
- To have S3 serve the files like a web server, we need to enable website mode on the S3 bucket. We can do this from the AWS console, or the commandline - we will use the commandline. Issue the following command in the terminal:
aws s3 website s3://idevelop-lab5-<yourinitials> --index-document sqs-standard.html --region ap-northeast-1 --profile aws-lab-env
From Step 8 to Step 11A, the Public policy will be applied to your bucket for lab purpose only and this is a security risk. If you do not want to public your bucket and just want to public objects. Please skip to Step 11B.
- Finally, you need to add a bucket policy to the S3 bucket to allow anonymous requesters to read the objects in the bucket. The policy document has been provided for you in the bucket/policy.json file, but needs to be edited to update the bucket name to match your bucket name.
Use the Eclipse IDE or Cloud9 to open the file <path_to_exploded_zip>/bucket/policy.json. The file has the following contents:
{
  "Version": "2012-10-17",
  "Statement": [
    {
      "Sid": "PublicReadGetObject",
      "Effect": "Allow",
      "Principal": "*",
      "Action": ["s3:GetObject"],
      "Resource": ["arn:aws:s3:::idevelop-lab5-<yourinitials>/*"]
    }
  ]
}
Update the file and replace idevelop-lab5-<yourinitials> with the name of your bucket. Make sure the /* remains at the end of the bucket name. This is important because it specifies that all files beneath the root of the bucket are accessible via the Action s3:GetObject.
- Save the file.
- In the terminal window,
cdinto the folder that you exploded from the zip file.
To update the bucket policy, use the commandline with the following command:
aws s3api put-bucket-policy --bucket idevelop-lab5-<yourinitials> --policy file://bucket/policy.json --region ap-northeast-1 --profile aws-lab-env
Ensure you replace the bucket name with your bucket name.
- A. Copy the contents of the folder you exploded the zip file into, to the S3 bucket you created earlier, using the following command:
aws s3 cp . s3://idevelop-lab5-<yourinitials> --recursive --region ap-northeast-1 --profile aws-lab-env
- B. Copy the contents of the folder you exploded the zip file into, to the S3 bucket you created earlier and public all the uploaded objects, using the following command:
aws s3 cp . s3://idevelop-lab5-<yourinitials> --recursive --region ap-northeast-1 --profile aws-lab-env --acl public-read
The files will be copied to your S3 bucket.
- After the command executes, you are ready to review the website in your browser. Open a web browser and browse to the following location (making sure you update the bucket name to include your initials, so that the bucket name matches the name of the bucket you have created):
http://idevelop-lab5-<yourinitials>.s3-website-ap-northeast-1.amazonaws.com/sqs-standard.html
- If all is well, you should be greeted with the following view in the browser:
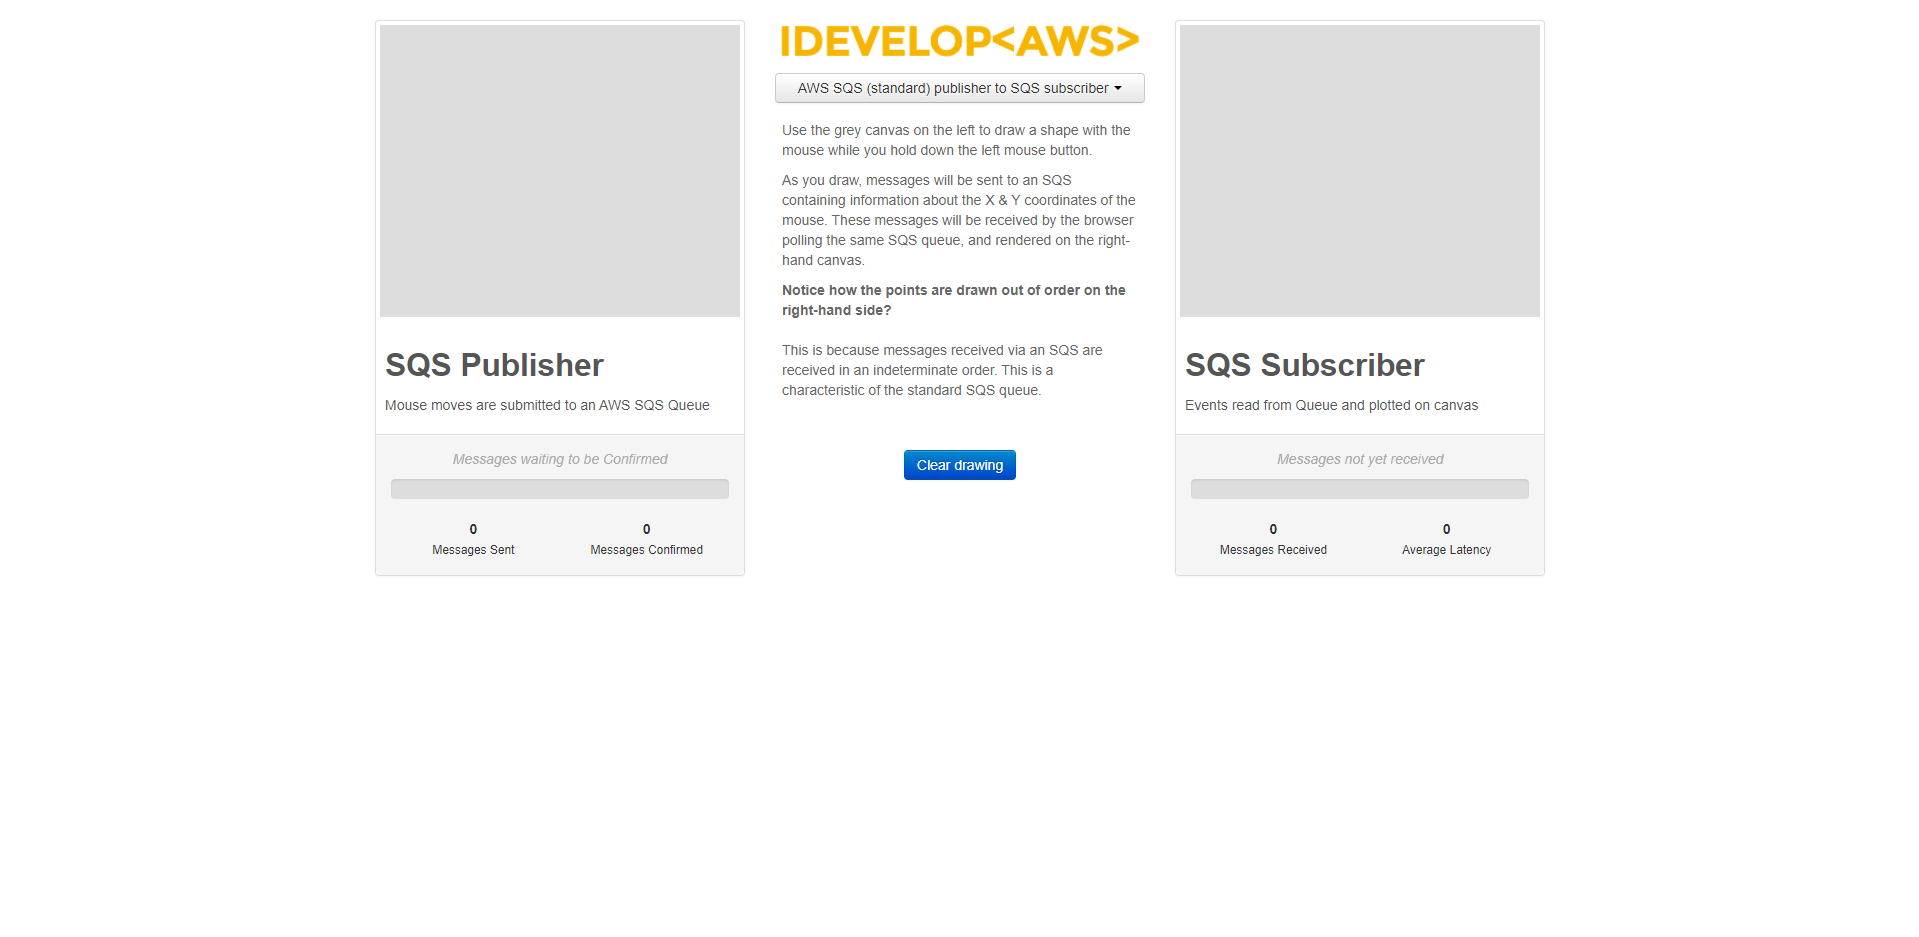
To be sure, use the browser’s developer view to check the console does not have any errors connecting to the AWS services.
SQS Queue Setup
The lab environment setup has configured the SQS queues used in this lab, using a CloudFormation template.
- Open the SQS console in the browser. You will see the queues that have been provisioned for you. These queues will be used in the following examination of the behaviour of SQS queues:
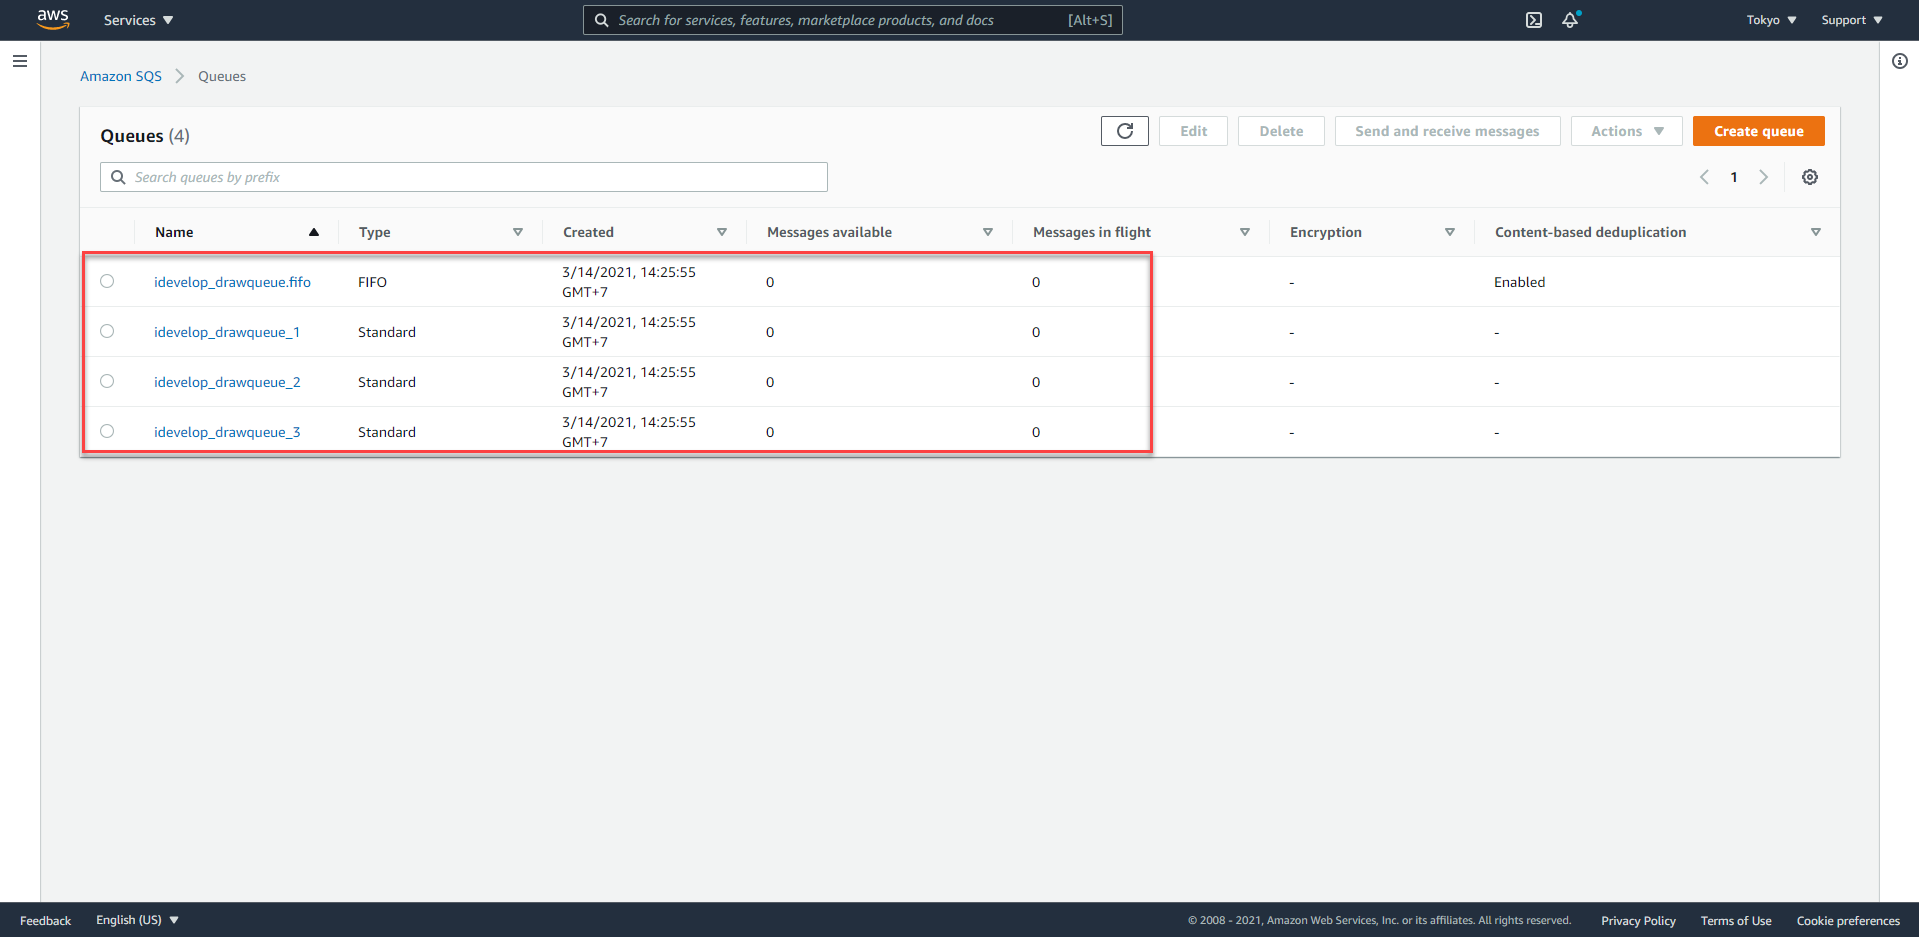
- Four queues have been provisioned. Three are standard queues, and one is a FIFO queue. Here is a snippet of the CloudFormation template that provisioned these resources:
"idevelopDrawQueueFIFO": {
	"Properties": {
		"QueueName": "idevelop_drawqueue.fifo",
		"FifoQueue": true,
		"ContentBasedDeduplication": true
	},
	"Type": "AWS::SQS::Queue"
},

"idevelopDrawQueueStandard1": {
	"Properties": {
		"QueueName": "idevelop_drawqueue_1"
	},
	"Type": "AWS::SQS::Queue"
}
As you can see, it is very easy to use CloudFormation to declare your SQS infrastructure. You can also use the Create New Queue button in the AWS Console to create a queue manually.